Build Your Own Ngrok Using SSH Tunneling and Nginx
SSH Tunneling နဲ့ Nginx ကို အသုံးပြုပြီး ကိုယ်ပိုင် Self-Hosted Ngrok Alternative တစ်ခု တည်ဆောက်ခြင်း

ကျနော်တို့ တော်တော်များများ ကိုယ့် localhost မှာ run နေတဲ့ Web Application ကို သူများတွေကိုစမ်းခိုင်းချင်တာမျိုး ၊ develop လုပ်နေတုန်း ပြဖို့လိုလာတာမျိုးကြုံဖူးကြမယ်ထင်ပါတယ်။ အဲ့လိုအချိန်မှာဆိုရင် ကိုယ့် Localhost ကို Public Internet ကနေ access လုပ်နိုင်အောင် လုပ်ဖို့လိုလာပါပြီ။ Ngrok က အဲ့ဒီအတွက် လူသုံးများတဲ့ tool တစ်ခုဖြစ်ပေမယ့် ကျနော် share ပေးချင်တာက Ngrok အစား EC2 server တစ်လုံးပေါ်မှာ ကိုယ်ပိုင် domain နဲ့ self-host ထားတဲ့ localhost tunnel တစ်ခု ဘယ်လိုတည်ဆောက်ကြမလဲဆိုတာပဲဖြစ်ပါတယ်။
Prerequisites
SSH နဲ့ Nginx အကြောင်း အနည်းငယ်တော့ သိထားဖို့လိုမယ်။
EC2 Server or any Remote VPS တစ်လုံးကို ဘယ်လိုဆောက်ရမလဲဆိုတာကို သိထားဖို့လိုမယ်။
Server ရဲ့ firewall ကို SSH နဲ့ HTTP, HTTPS allow လုပ်ဖို့ ဘယ်လို configure လုပ်ရမလဲဆိုတာ သိထားဖို့လိုမယ်။
ကိုယ်ပိုင် Domain Name တစ်ခု ရှိထားဖို့လိုမယ်။
EC2 Server Setup
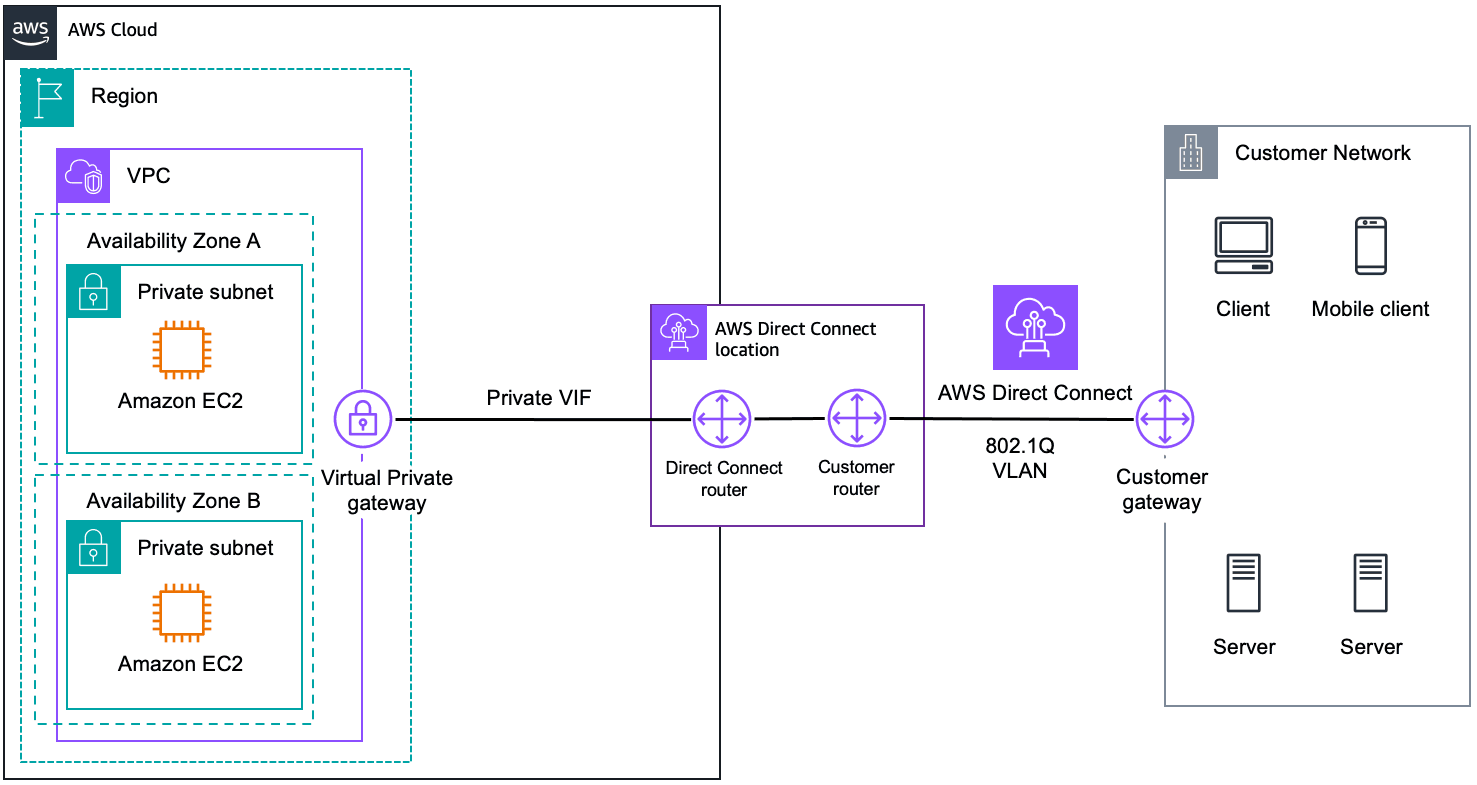
EC2 server တစ်လုံးကို ဘယ်လိုဆောက်ရမလဲဆိုတာကိုတော့ အပြည့်အစုံ မရှင်းပြတော့ပါဘူး။ အတိုချုံးပြောရရင် EC2 or any remote VPS တစ်လုံးဆောက်ပြီး Web Traffic အတွက် port 80 နဲ့ 443, SSH traffic အတွက် port 22 ကို allow လုပ်ထားရင်ရပါပြီ။ 80နဲ့ 443ကိုတော့ public ဖွင့်ထားပြီး SSH IP whitelist ကိုတော့ ကိုယ်လိုချင်တဲ့အတိုင်း configure လုပ်နိုင်ပါတယ်။
SSHD Configuration
SSH tunneling ကို setup လုပ်ဖို့အတွက် EC2 server ပေါ်မှာ SSH daemon (SSHD) ကို configure လုပ်ရပါမယ်။
SSH tunnel အတွက် အသစ် user တစ်ယောက် ဆောက်ပါမယ်: ဒီ user ကို SSH tunnel အတွက်ပဲသုံးပါမယ်။
sudo useradd -m -s /usr/sbin/nologin tunneluserဒီ command က
tunneluserလို့ခေါ်တဲ့ အသစ် user တစ်ယောက်ကို login shell မပါဘဲ ဆောက်ပေးပါမယ်။nologinကို အသုံးပြုရတဲ့ ရည်ရွယ်ချက်ကတော့ tunnel အတွက် private key ရှိတဲ့ user တွေကို server ပေါ်မှာ command တွေ run လို့မရအောင် shell access ပိတ်ထားဖို့ ဖြစ်ပါတယ်။SSHD configuration ဖိုင်ကို edit လုပ်ပါမယ်: SSHD configuration ဖိုင်ကို text editor နဲ့ ဖွင့်ပါမယ်။
sudo vim /etc/ssh/sshd_configConfiguration ကို edit လုပ်ပါ: SSHD configuration ဖိုင်ရဲ့ အဆုံးမှာ အောက်ကလိုင်းတွေအတိုင်း ထည့်ပါမယ်။
 Match User tunneluser
     AllowTcpForwarding yes
     ForceCommand /usr/sbin/nologin
     X11Forwarding no
     AllowAgentForwarding no
     PermitTunnel no
     PermitTTY no
     GatewayPorts clientspecified
Configuration ထဲကတချို့ option တွေရဲ့ အဓိပ္ပါယ်:
Match User tunneluser: Settings တွေကိုtunneluserအတွက်သာ သက်ရောက်စေပါမယ်။AllowTcpForwarding yes:tunneluserအတွက် TCP forwarding ကို ခွင့်ပြုပါမယ်။ForceCommand /usr/sbin/nologin: user က command run လို့မရအောင် ကန့်သတ်ထားတာပါ၊ security အတွက်ပါ။GatewayPorts clientspecified: client က tunnel အတွက် port ကို သတ်မှတ်ခွင့် ပြုပါမယ်။ ဒီ option ပါမှ user က ကိုယ် forward လုပ်ချင်တဲ့ port ကို specify လုပ်ပြီး forwardလို့ရမှာပါ။
SSHD service ကို restartလုပ်ပါ: config တွေကို effect ဖြစ်ဖို့ SSHD service ကို restart လုပ်ပါ။
sudo systemctl restart sshdTunneluser အတွက် Public Key setup လုပ်ပါ:
tunneluserကို local ကနေ ssh connect လုပ်လို့ရအောင်လို့/home/tunneluser/.ssh/authorized_keysထဲမှာ ကိုယ်သုံးမယ့် Public Key ကို edit လုပ်ပြီးထည့်ပါ။sudo vim /home/tunneluser/.ssh/authorized_keys
ဒီအဆင့်တွေကို လိုက်လုပ်ပြီးရင် tunneluser အတွက် SSH tunneling ကို configure လုပ်လို့ပြီးပါပြီ။ ပြီးရင်တော့ Nginx ကို configure လုပ်ပြီး domain ကနေ SSH tunnel ကို traffic route လုပ်ပေးဖို့ လုပ်ပါမယ်။
Nginx Configuration
Public Internet ကနေ လှမ်းပြီး access လုပ်ဖို့အတွက် web traffic တွေကို serve လုပ်ပေးမယ့် web server တစ်ခုလိုပါတယ်။ ကျနော်ကတော့ Nginx ကိုသုံးထားပါတယ်။
Nginx Config တစ်ခုဆောက်ပြီး အောက်ကအတိုင်းပြင်ပါမယ်
server {
  server_tokens off;
  listen 443 ssl;
  server_name ~^t(?<port>\d+)\.tunnel\.thurahtetaung\.me$;
  ssl_certificate /etc/letsencrypt/live/tunnel.thurahtetaung.me/fullchain.pem;
  ssl_certificate_key /etc/letsencrypt/live/tunnel.thurahtetaung.me/privkey.pem;
  location / {
      # If the port extraction fails, return 404
      if ($port = "") {
          return 404;
      }
      resolver 169.254.169.253; #AWS Internal DNS resolver
      proxy_pass http://localhost:$port;
      proxy_set_header Host $host;
      proxy_set_header X-Real-IP $remote_addr;
      proxy_set_header X-Forwarded-For $proxy_add_x_forwarded_for;
      proxy_set_header X-Forwarded-Proto $scheme;
  }
}
server {
  server_tokens off;
  listen 80;
  server_name ~^t(?<port>\d+)\.tunnel\.thurahtetaung\.me$;
  return 301 https://$host$request_uri;
}
ဒီ config ထဲမှာဘာတွေပါလဲကြည့်ရအောင်။ အဓိက ကျနော်တို့ လုပ်ချင်တာက server ကိုဝင်လာတဲ့ request ထဲက domain ကိုဖတ်ဖို့ပါ။ t2345.tunnel.thurahtetaung.me ဆိုတဲ့ subdomain နဲ့ခေါ်လိုက်ရင် server ရဲ့ localhost:2345 ကို proxypass လုပ်ပေးဖို့ရေးထားတာပါ။ ဘယ် port number ကိုပဲ subdomain ခေါ်ခေါ် resolve ဖြစ်အောင်လို့ server name မှာ regex နဲ့ match လုပ်ထားပြီး port ကို variable ပြန်ဖမ်းပြီး proxypass ပေးထားပါတယ်။ ကိုယ့် Domain ရဲ့ DNS provider မှာ subdomain ကို EC2 ရဲ့ Public IP နဲ့ သွား bind ပေးဖို့လိုပါမယ်။ ကျနော်က txxxx.tunnel.thurahtetaung.me ဆိုပြီး subdomain ကို dynamicထားချင်တာမို့လို့ DNS record မှာ *.tunnel.thurahtetaung.me ဆိုပြီး wildcard bindပေးရပါတယ်။ ဒီမှာ second level subdomain သုံးထားတာက ကျနော့်မှာ တခြား first level subdomain တွေသုံးထားတာရှိသေးတော့ first level မှာ * နဲ့ wildcard ပေးလို့မရလို့ပါ။ Domain ကတဆင့်ခေါ်လိုက်ရင် server ရဲ့ localhost:2345 က ကျနော်တို့ Local Computer ရဲ့ localhost:2345 နဲ့ ssh tunnel ချိတ်ထားမှာမလို့ request ကကျနော်တို့ရဲ့ Local Computer ထဲကိုရောက်လာမှာပါ။ ဒီမှာကျနော်က HTTPS ရအောင်လို့ Let's Encrypt ရဲ့ free SSL Certificate ကို generate လုပ်ပြီးသုံးထားပါတယ်။ အဲ့အတွက် အသေးစိတ်တော့ စာရှည်မှာစိုးလို့ ဒီblogမှာမရေးတော့ပါဘူး။ စိတ်ဝင်စားရင် ဒီ Link မှာဘယ်လိုလုပ်ထားလဲကြည့်လို့ရပါတယ်။ ဒီလောက်ဆို server ဘက်မှာ setup and configuration အပိုင်းပြီးပါပြီ။
Local SSH Config
အခု ကျနော်တို့ local computer မှာ tunnel ချိတ်ဖို့အတွက် SSH Config ရေးပါမယ်။
vim ~/.ssh/config
Host lab-tunnel
    HostName mytunnel.thurahtetaung.me
    User tunneluser
    IdentityFile ~/.ssh/id_ed25519_tunnel.pem  # Replace with the path to your private key
    RemoteForward *:3000 localhost:3000
    ServerAliveInterval 60
    ServerAliveCountMax 3
    ExitOnForwardFailure yes
    TCPKeepAlive yes
Hostname နေရာမှာ Server ရဲ့ Public IP ကိုထည့်ပေးရပါမယ်။ ကျနော်ထည့်ထားသလိုမျိူး domain တစ်ခုထည့်ထားချင်ရင်လည်း DNS record မှာ serverရဲ့ IPနဲ့ bind ထားလို့ရပါတယ်။
RemoteForward *:3000 localhost:3000 ဒီနေရာမှာကိုယ် forward လုပ်ချင်တဲ့ port တွေကို တစ်လိုင်းချင်းစီလာထည့်ထားလို့ရပါတယ်။ Remote Port နဲ့ Local Port ကမတူလည်းကိစ္စမရှိပါဘူး။ Domain မှာ port မှန်အောင်ထည့်ခေါ်ရင်ရပါပြီ။ IdentityFile ~/.ssh/id_ed25519_tunnel.pem ဒီနေရာမှာကိုယ် server ပေါ်မှာ ထည့်ခဲ့တဲ့ Public Key ရဲ့ Private Key ကို point ပေးရပါမယ်။ အကုန်ပြင်ပြီးရင်တော့ save လုပ်လိုက်ပါ။
Let's Test It!
ကဲ အပေါ်ကအဆင့်တွေအကုန်ပြီးပြီဆိုရင်တော့ ကျနော်တို့ Tunnel လေးကိုစစမ်းလို့ရပါပြီ။
Tunnel ကိုသုံးဖို့အတွက် ssh ကို auto reconnect လုပ်ပေးနိုင်တဲ့ autossh ကိုသုံးပါမယ်။
For ubuntu
sudo apt install autossh
For MacOS
brew install autossh
Install လုပ်ပြီးရင်
autossh -nNT lab-tunnel
lab-tunnel နေရာမှာ အပေါ်က SSH Config မှာပေးခဲ့တဲ့ နာမည်ကိုထည့်ပါ။ Command run ပြီးရင် Terminal ကိုဒီအတိုင်းထားထားပါ။ ပိတ်လိုက်ရင် Tunnel လည်းပိတ်သွားပါလိမ့်မယ်။ ကျနော်တို့ SSH Config မှာ localhost:3000 ကို tunnel လုပ်ထားတာဆိုတော့ တကယ်ရမရစမ်းကြည့်ရအောင်။
ကျနော်ကတော့ အလွယ်စမ်းလို့ရအောင် Hello World HTML လေးတစ်ခုကို
npx serve
ဆိုပြီး host ပြီးစမ်းထားပါတယ်။
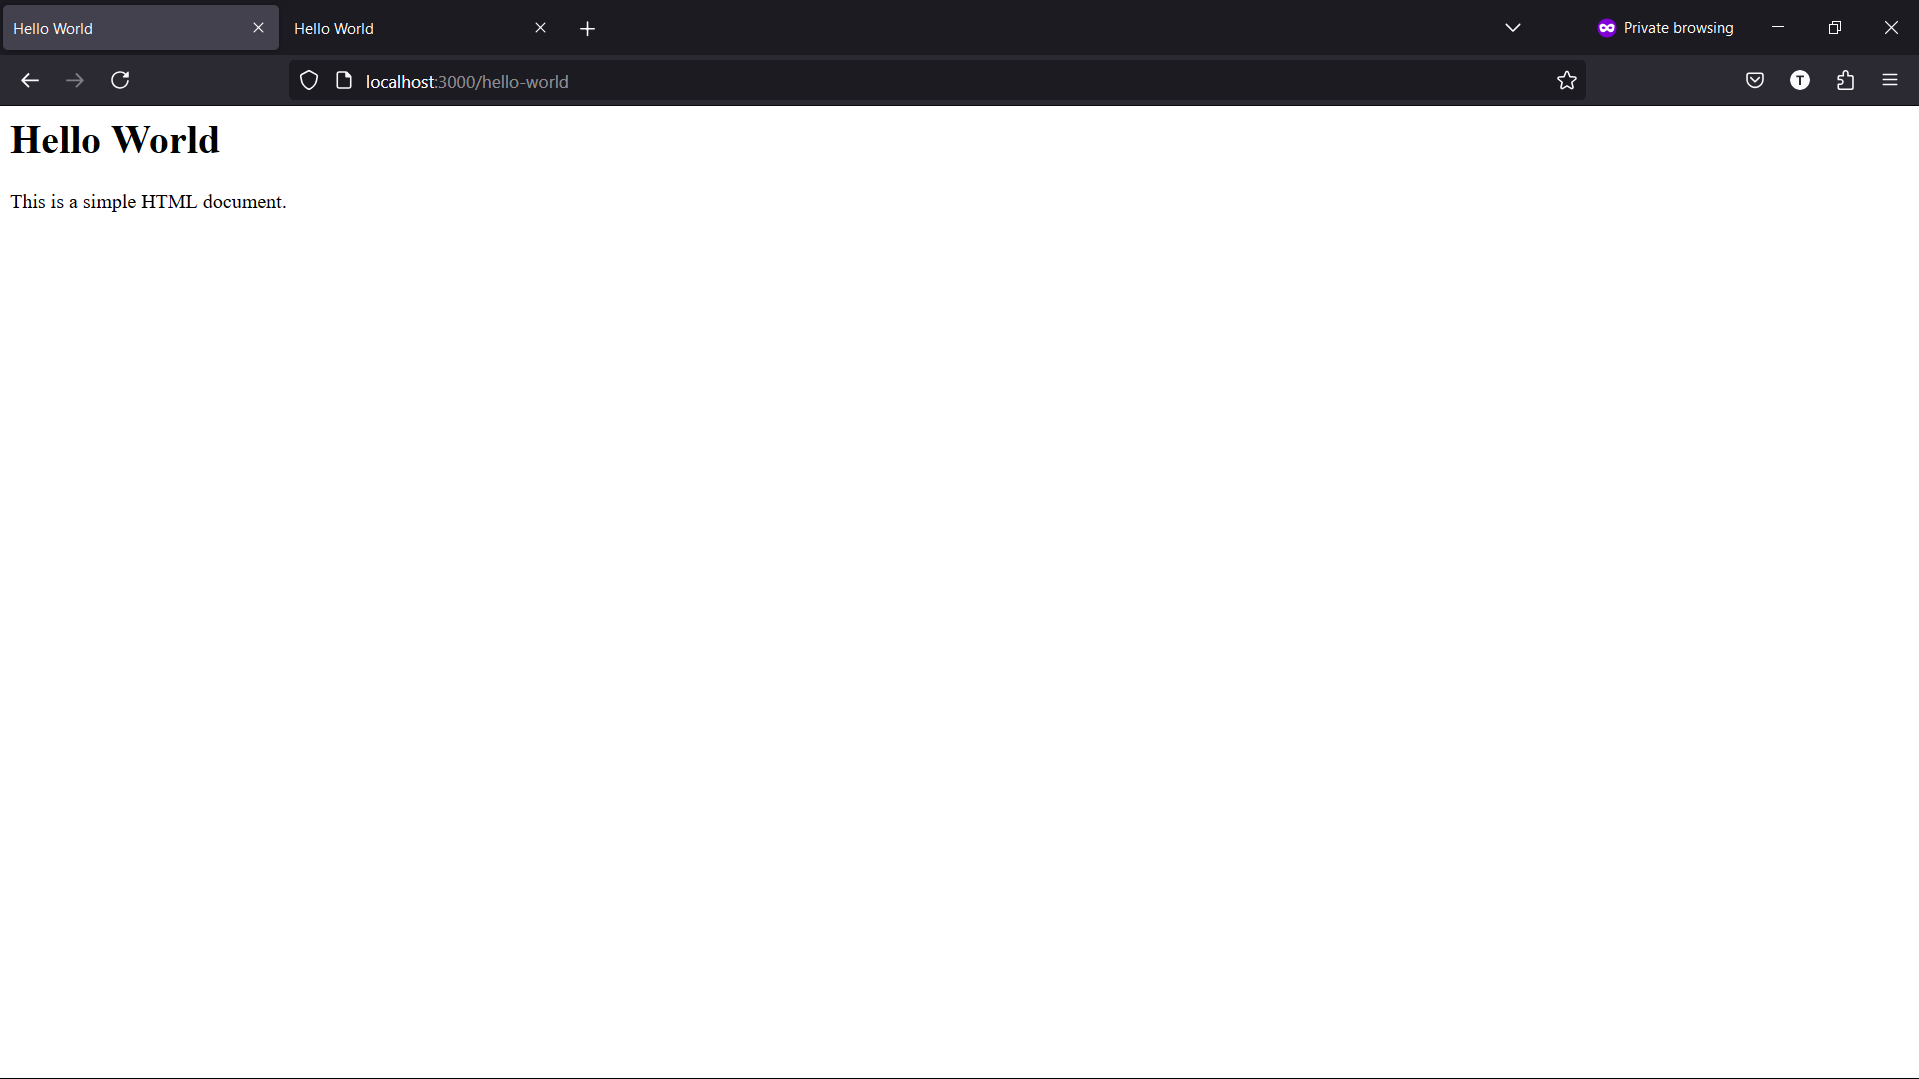
ဒါကတော့ ကျနော့် Local Computer ရဲ့ localhost:3000 မှာ run နေတာပါ။
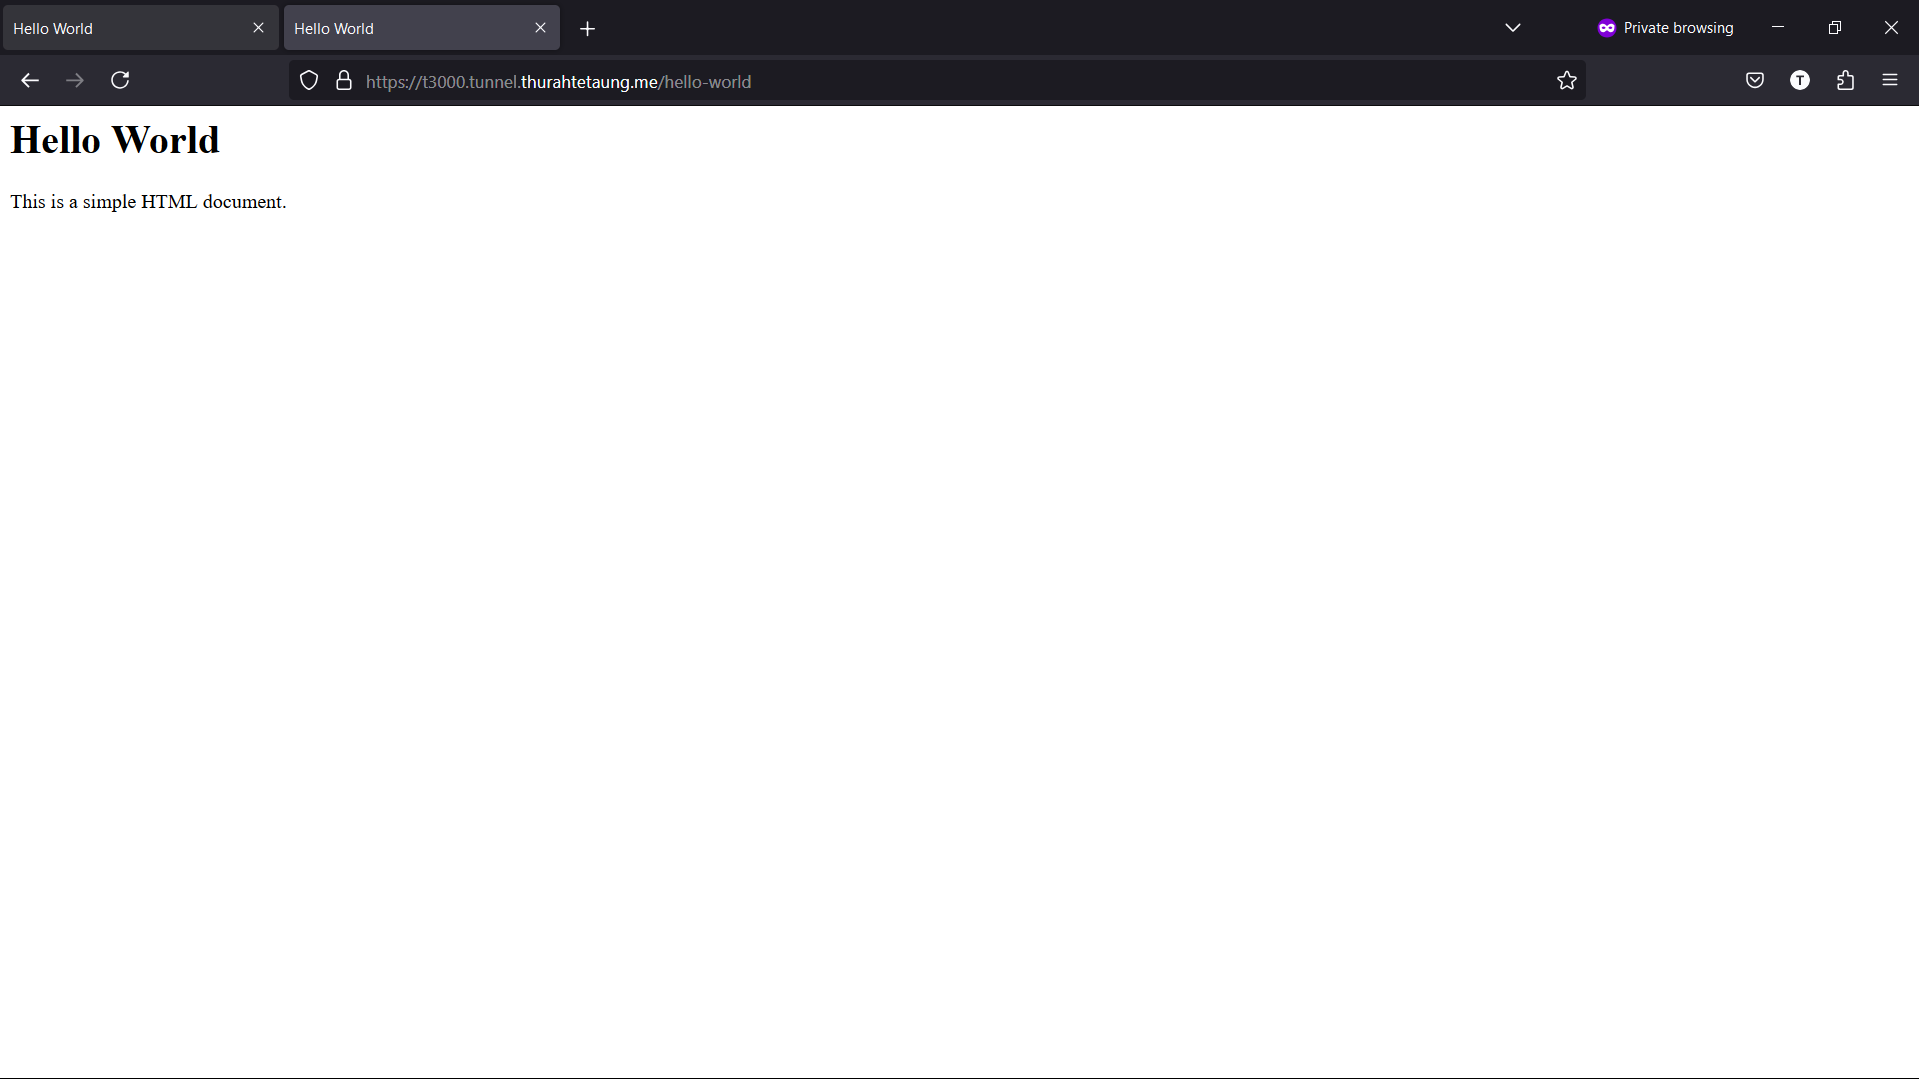
ဒါကတော့ t3000.tunnel.thurahtetaung.me subdomain ကနေလှမ်းခေါ်ထားတာပါ။ ဒါဆိုရင်တော့ ကျနော်တို့ Tunnel လေးကအလုပ်ဖြစ်ပါတယ်။
လိုက်လုပ်ကြည့်ရင်း ကိုယ်တိုင်သုံးဖို့ပဲဖြစ်ဖြစ် အလုပ်မှာသုံးဖို့ပဲဖြစ်ဖြစ် တစ်ခုခုအကျိုးရှိသွားမယ်လို့ မျှော်လင့်ပါတယ်။ တစ်ခုခုမေးချင်တာ ၊ အကြံပြုချင်တာရှိရင်လည်း Comment ချန်ထားခဲ့နိုင်ပါတယ်။အချိန်ပေးပြီးဖတ်ပေးတဲ့သူအားလုံးကိုကျေးဇူးတင်ပါတယ်ဗျာ။